Last updated November 18, 2026




Free written scope consultation - allowances, timeline, and change-order rules on paper before a single trade is scheduled
Driveway & Pavers Maintenance Checklist for Berkeley Homeowners
Pressure-washing a paver driveway until it looks new is the most popular maintenance step in Berkeley, and it’s also the one that hides the most expensive problem. A surface that reads clean in October can carry three inches of lateral shift by March, because the sand bed underneath moved during the wet season and nobody checked. The pavers stayed level enough to look fine while the base lost its grip. What follows is a maintenance framework built around what’s under your pavers, not just what’s on top of them: the clay soils of the Berkeley flatlands, the root systems of our street trees, and the wet-dry cycles that arrive with each atmospheric river. You’ll get inspection tolerances, re-jointing versus base reset, winter prep, and a twice-a-year checklist you can actually run.
Quick Answer
Driveway and paver maintenance in Berkeley means inspecting twice a year for base settlement and joint sand loss, re-jointing with polymeric sand when joints open beyond 3/16 inch, and clearing drainage channels before the winter rains. Surface cleaning helps appearance but does not fix base failure caused by expansive clay soils or tree root intrusion. If pavers have shifted more than 1/4 inch vertically or laterally, you’re looking at a partial base reset, not a reseal.
Styles & brands we work with
- Kitchen remodeling
- Bathroom remodeling
- Home additions & ADU
- Roofing
- Windows & doors
- Driveway & pavers
- Fence
Table of Contents
- Why Berkeley Pavers Fail Differently
- Clay Soils and Base Failure in the Flatlands
- Tree Root Intrusion: The Inspection Zones You’re Missing
- Polymeric Sand Re-Jointing vs. Full Base Reset
- Winter Prep for Atmospheric River Events
- The Twice-Annual Inspection Checklist
- Measurements: What’s Acceptable and What Isn’t
- Paver Brands and What Their Warranties Actually Cover
Why Berkeley Pavers Fail Differently
Most paver maintenance advice is written for places with a deep winter freeze or a long dry summer. Berkeley has neither. What we have is a mild, wet winter followed by a dry season, and a soil profile that expands when it’s wet and contracts when it dries. That cycle is the single biggest driver of paver failure in this city, and it’s why a generic “seal every three years” schedule doesn’t match the actual failure mode.
The mechanism is straightforward once you picture it. Water enters the joint sand, works down through the bedding layer, and reaches the compacted base. In clay-heavy areas, that base material swells slightly as it absorbs moisture. When the dry season returns, it shrinks back. Repeat that cycle across several winters and the base aggregate loses interlock. The pavers above it settle unevenly, joints widen, and sand migrates out through the gaps. You can clean and seal the surface every year and the base will still move underneath it.
Berkeley’s tree canopy adds a second force. Roots seek moisture, and a paver driveway with a sand joint is a moisture highway. Larger trees will send roots into the bedding layer and lift pavers in a pattern that looks random until you trace it back to the trunk.
The practical takeaway: inspect for base movement and root pressure before you spend a dollar on cleaning or sealing. A driveway that’s structurally sound is worth sealing. One that’s already moving isn’t, until the base is corrected.
Clay Soils and Base Failure in the Flatlands
The flat neighborhoods west of the hills sit on some of the most expansive clay soils in the East Bay, and that has a direct effect on how often a paver driveway needs attention. Expansive clay changes volume with moisture content. A properly built base isolates the pavers from that movement with a compacted aggregate layer of adequate depth. A base that was built thin, or built over soil that wasn’t properly prepared, transmits the clay’s movement straight up to the surface.
Here’s what base failure from clay looks like, in the order you’ll usually notice it:
- Widening joints in low-traffic zones first. The car tires compact one path, so the settlement shows up at the edges and corners where nothing presses down.
- Sand washing out after rain. You sweep sand into the joints in fall, and it’s gone by January. That sand is draining through a gap in the base, not sitting where it should.
- A low spot that holds water. Standing water after rain is the clearest sign the base has settled. Water finds the lowest paver and stays there.
- Edge pavers tipping toward the yard or street. When the base at the perimeter gives way, the edge restraint loses its anchor and the border pavers rotate.
- A hollow sound underfoot. Tap pavers with a mallet. A dead thud with no give is normal. A hollow ring means the paver is bridging a void.
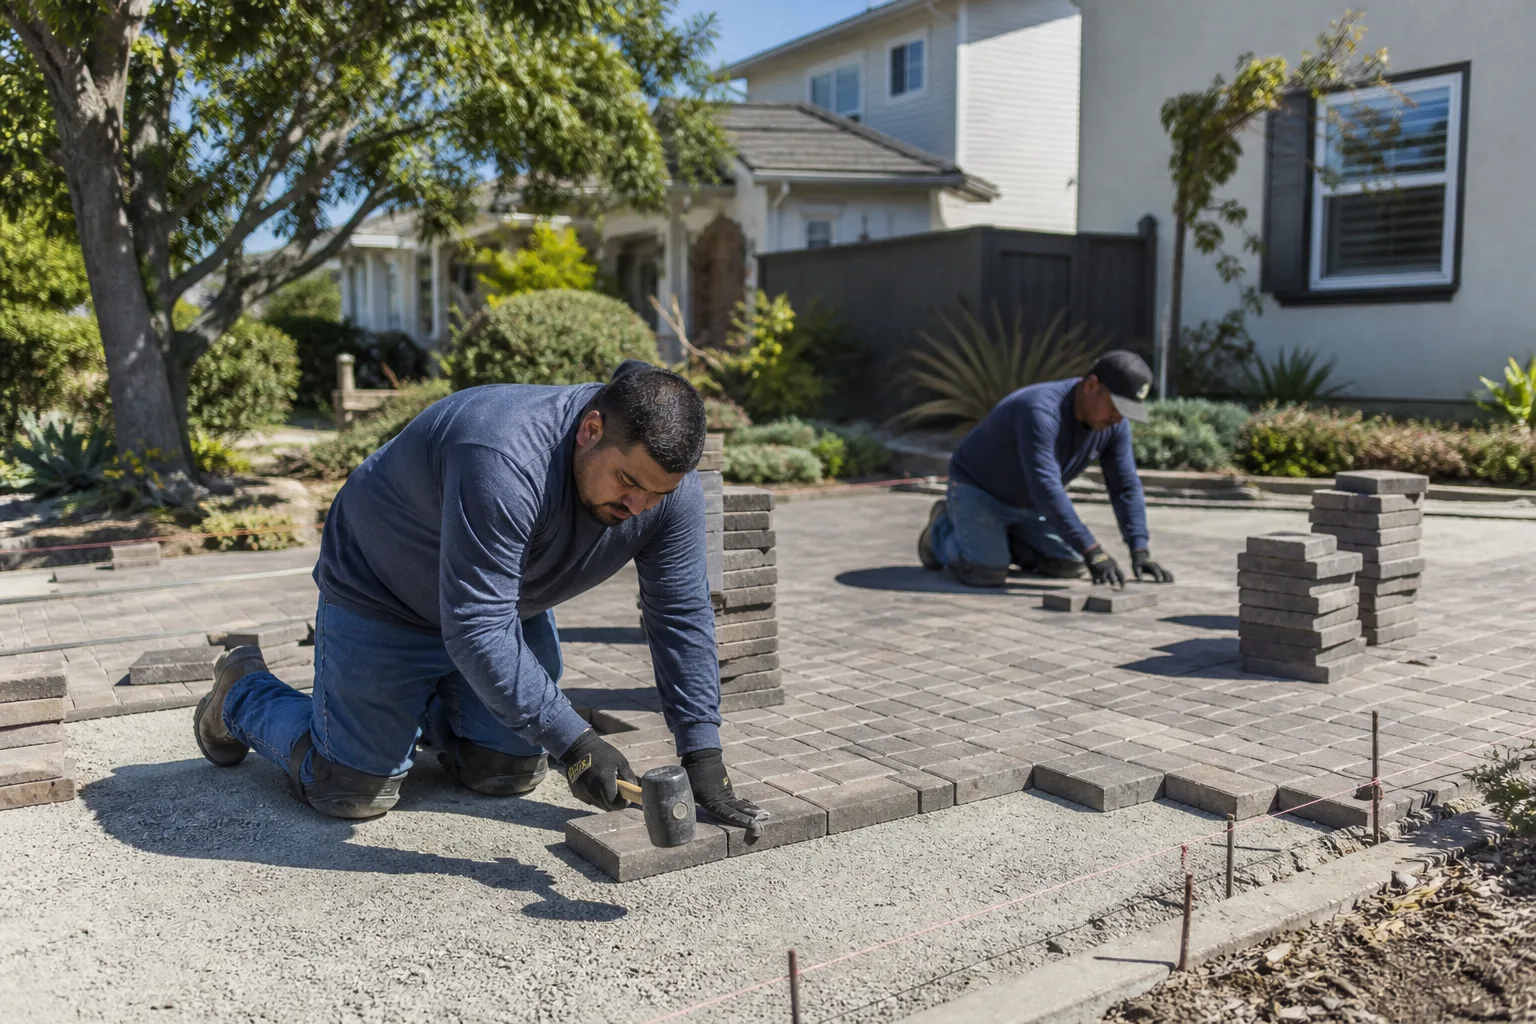
Base failure from clay is not something surface work fixes. Sealing a driveway over a settled base traps moisture and makes the problem worse. The correction is to lift the affected field, re-compact or rebuild the base to the right depth, and reset the pavers. On a moderately sized driveway in Berkeley, that’s a focused repair on the failing zone rather than a full replacement, and it’s the sort of call that should come from someone who can read the base, not just look at the surface.
For homeowners planning a new driveway or a full reset rather than a repair, driveway & pavers work is where the base spec gets decided, and it’s the decision that determines how much maintenance you’ll do over the next decade.
Tree Root Intrusion: The Inspection Zones You’re Missing
Berkeley’s street trees are one of the best things about living here and one of the hardest things on a paver driveway. Liquid amber, magnolia, and ficus all send roots toward moisture, and a joint-sand driveway with a healthy subgrade underneath is exactly where they want to go. The trouble is that root damage starts underground, and by the time a paver lifts, the root has usually been there for a season or two.
Most homeowners inspect the center of the driveway, where they walk and park. The damage almost never starts there. Check these zones instead:
Zone 1: The drip line to the pavement edge
Measure from the tree trunk out to the edge of its canopy. That’s the drip line. The pavement closest to the drip line sees the most root pressure. Walk that strip and look for pavers that have lifted evenly in a line, like something is pushing up from below. Root lift tends to produce a straight or gently curved ridge, not a random low spot.
Zone 2: Utility trenches and old planting strips
Roots follow the path of least resistance, and a backfilled utility trench is softer than undisturbed soil. If your driveway crosses an old trench line, even one from decades ago, inspect that band. Pavers settling along a straight line are often following a trench, not a clay pocket.
Zone 3: The apron and street transition
The bottom of the driveway where it meets the sidewalk or street is where water pools and where street-tree roots find their way in. This zone takes more runoff than anywhere else on the property. Check it every spring, because a lifted apron paver is a trip hazard at the exact spot where people step off the curb.
Zone 4: Planter and lawn borders
Roots from shrubs and ornamental trees in adjacent beds will cross under the edge restraint. If a bed runs along one side of the driveway, inspect that side first every time. Root pressure from a border planting shows up as a row of pavers that gradually rotate toward the bed.
If you find root lift, the fix depends on the root size. A small feeder root can sometimes be cut and the paver reset. A structural root can’t be cut without risking the tree, and the correction becomes a base rebuild that accommodates the root or a redesign of the affected zone. Either way, a lifted paver is the symptom, and the root is the cause. Treating the paver alone guarantees it comes back.
Polymeric Sand Re-Jointing vs. Full Base Reset
These are the two repairs most often confused, and getting the choice wrong wastes money in both directions. Re-jointing is a surface repair: you remove the old joint material, clean the joints, and install fresh polymeric sand that hardens when it’s hydrated. It restores the joint’s ability to lock pavers together and shed water. It does nothing for a moving base.
Polymeric sand re-jointing is the right call when:
- Joints are open, but the pavers themselves are level and stable.
- The joint sand has washed out after a wet winter but there’s no settlement.
- The driveway is two to five years from its last jointing and hasn’t shown any vertical movement.
- You can walk the entire surface and find no hollow spots and no standing water.
A full base reset is the right call when:
- Pavers have settled more than 1/4 inch vertically from the surrounding plane.
- Standing water remains more than a day after rain in a low spot.
- Edge restraint has separated and pavers are migrating outward.
- Hollow sounds underfoot suggest bridging over voids.
- Root lift has created a ridge, not just wide joints.
The two most expensive mistakes are re-jointing a driveway whose base has failed (you spend the money and the joints open again within a season) and resetting a base that only needed new sand (you pay for a repair you didn’t need). The way to tell them apart is measurement, not a guess. Vertical variation above 1/4 inch across a straightedge is the threshold where a reset becomes the honest answer.
We’ve seen dozens of Berkeley driveways where the failure line fell somewhere in the middle: a local repair on the heavy-use zone plus re-jointing across the whole surface. That’s often the most cost-effective path, and it’s the kind of judgment a contractor who reads the base can make on an initial estimate.
Winter Prep for Atmospheric River Events
Berkeley winters don’t bring much cold, but they bring rain in short, heavy bursts. An atmospheric river can drop several inches in a few days, and that’s the type of event that exposes a paver driveway’s weak points. The prep work that matters is all about moving water off the pavement fast and keeping it from getting under it.
- Clear the drainage channels. Find every channel drain, trench drain, and swale that serves the driveway. Remove leaves, silt, and any paver joint sand that has migrated into the channel. A blocked channel during a heavy rain event means water backs up onto the pavement, and the joints take the overflow.
- Check edge restraint integrity. Walk the perimeter of the driveway and look for restraint that has pulled away from the pavers. A separated edge is the entry point for water to get under the base. If the restraint is loose, water finds it before you do.
- Top off joint sand before the first big rain. Sweep fresh joint sand into gaps that have opened. Don’t overfill; just restore the joint to its proper depth so water sheds off rather than pooling in the joint lines.
- Clear the transition at the street. The apron zone is where runoff from the street meets your driveway. Clear the gutter and any drain grate at the transition so the storm flow has somewhere to go besides the lowest paver.
- Flag the low spots. Note any spot that held water last winter, and put a mark on it before the first storm. It’s much easier to diagnose a low spot when you’ve tracked it across the season.
- Inspect after, not just before. Walk the driveway after the first big storm and look for new movement, sand migration, or standing water. The first heavy rain of the season is the best diagnostic tool you have.
Two winter details specific to Berkeley. First, leaf drop from our street trees happens late and heavy, so a channel that’s clear in September is not clear in November. Second, our heavy rain comes in bursts rather than a slow, steady soak, so the water volume hitting a driveway is high for a short window. Clear channels and a sound edge restraint handle that volume; a weak spot anywhere else is where the pavement fails.
If the driveway didn’t drain well last winter, don’t wait to find out how it handles the next atmospheric river. That’s a call for a free inspection and estimate, not a problem that resolves itself between storms.
The Twice-Annual Inspection Checklist
Run this inspection once in spring, after the wet season ends, and once in fall, before the rains return. Each pass takes about 30 to 45 minutes on a typical driveway. Keep notes and measurements from one pass to the next; the trend matters more than any single reading.
The Spring Inspection (after the last heavy rain)
- Walk the full surface and mark any standing water. There should be none after 24 hours of dry weather. Any standing water is a base settlement signal.
- Lay a 4-foot straightedge across the driveway in three directions (length, width, and diagonal). Measure the gap between straightedge and paver at its widest point. Anything over 1/4 inch is problematic settlement.
- Measure joint widths at ten spots. A standard paver joint is about 1/8 inch. Joints over 3/16 inch need re-jointing, and joints over 1/4 inch mean the sand has moved enough that you should look for base issues underneath.
- Tap-test each section with a mallet. A hollow ring means a void underneath. Map any hollow areas before you do anything else.
- Inspect the edge restraint all the way around. It should be tight to the pavers with no visible gap and no tipping.
- Check root zones under trees. Walk the drip-line band first, then the border zones, looking for even lift along a line.
- Check that all drain grates and channels are clear. Clear them now, not in November.
The Fall Inspection (before the rains)
- Compare measurements against your spring notes. Settlement of more than 1/4 inch since the spring pass is a red flag.
- Re-sweep joint sand into any gaps that opened over the dry season. Restore all joints before the rain, and note whether the same joints are the ones that opened last year.
- Clear every drainage channel and trench drain. Remove leaves and silt, and confirm the pitch leads water away from the pavement.
- Re-check the edge restraint and the apron at the street. These are the two zones most exposed to winter runoff.
- Flag any low spot identified in the spring or during prior winters so you can watch what happens when the rain starts.
- Inspect the tree-root zones one more time before the wet season, when roots become most active.
- Note the driveway’s overall condition and any changes since spring. This becomes the baseline for the next year’s spring pass.
Two passes a year is the right schedule for Berkeley. A driveway that’s been properly built and maintained can go on that cadence indefinitely. One that’s already moving requires more frequent checks until the base issue is corrected.
Measurements: What’s Acceptable and What Isn’t
This is where maintenance becomes a decision rather than an opinion. Here are the tolerances we work to when evaluating a paver driveway in Berkeley.
- Vertical settlement: Up to 1/4 inch from the surrounding plane is within normal tolerance and can often be addressed with re-jointing and a spot reset. Over 1/4 inch is base settlement and calls for a partial base reset.
- Lateral shift at the edge: Any outward movement of the edge pavers beyond 1/8 inch means the edge restraint has lost its anchor. Investigate the base under the restraint before it becomes a larger repair.
- Joint width: Normal is about 1/8 inch. Over 3/16 inch, re-joint with polymeric sand. Over 1/4 inch, the sand migration is significant enough to inspect the bedding layer.
- Standing water: Any water remaining more than 24 hours after rain indicates a low spot. More than 48 hours means the base has settled or the drainage is blocked.
- Straightedge gap: A 4-foot straightedge should show no gap over 1/4 inch anywhere across the driveway. Larger gaps are the clearest signal for base work.
Those numbers convert a subjective “does it look okay?” into a repeatable pass/fail that a homeowner can run and a contractor can verify. If you’re tracking them twice a year, the trends tell you when a repair is due, rather than waiting for a failure to make the decision for you.
Paver Brands and What Their Warranties Actually Cover
The paver itself is one part of a system, and the maintenance schedule should account for what kind of pavers you have. The hardscape brands we install most often in Berkeley are Belgard, Unilock, and Techo-Bloc, and each carries a product warranty that’s independent of the installation. That’s an important distinction for maintenance because a warranty that covers surface wear and color fading won’t cover a base failure. Base movement is an installation issue, which is why a properly built base is the part of the system that earns its keep over a decade.
What to check on your own driveway when reading the brand’s warranty:
- Covered: Surface defects like spalling, structural cracking from the paver itself, and color fading beyond the brand’s published tolerance.
- Not covered: Settlement, base failure, efflorescence (the white bloom some pavers develop in wet climates), and installation errors.
- Installation warranty: That’s a separate conversation with the contractor who did the work, and it’s the one that covers what actually fails in Berkeley.
For homeowners whose maintenance plan is leading toward a reset or a new driveway, the paver brand decision should be made alongside the base specification. The brand determines how the surface will hold up; the base determines whether the surface gets a chance to.
If your project scope extends beyond the driveway and you want one contractor managing every phase, Construction Berkeley covers the full envelope of the home from exterior hardscape to interior remodeling, and we source from more than 50 manufacturer brands across every trade. That matters on a job where the paver spec, the fence line, and the addition footprint all have to agree before anyone breaks ground. Homeowners planning to add a structure alongside the driveway will find the same single-contractor approach under home additions & ADU, and when the driveway edge meets the property line, fence installation is where the edge restraint and the fence post foundations need to line up.
Common Mistakes to Avoid
- Pressure-washing without re-jointing. High-pressure washing strips the joint sand, and the joints are the system that holds the pavers together. If you pressure-wash, plan to re-sand and re-joint in the same week.
- Sealing a driveway with base movement. Sealant traps moisture, and on a settled base it accelerates the failure. Test with a straightedge and tap-test for voids before any sealing.
- Sweeping new sand into joints that keep opening without checking why. Refilling the same joints twice a year is a symptom management loop, not a fix. The sand is going somewhere, and that somewhere is a gap in the base.
- Ignoring the drip-line zone. The tree root pressure zone is almost never the center of the driveway, and it’s almost always the first place to show lift. Check there first, every time.
- Waiting for autumn to clear the drains. Berkeley’s leaf drop is late and heavy, and an atmospheric river in November doesn’t give you a warning window. Clear the drainage channels in the fall before the rain arrives.
- Skipping the fall inspection because the spring one looked fine. The spring pass measures damage after wet weather; the fall pass prevents it. Both matter, and the seasonal difference in what each catches is the point.
- Treating a lifted paver as a paver problem. A lifted paver is a symptom. The cause is almost always a root or a base void underneath, and replacing the paver without addressing the cause means the same paver lifts again.
See the difference
 Before
 After
 Before
 After
 Before
 After
When to Call a Professional
Some wear and tear is a maintenance task, and some is a repair. Call a professional when you see any of these:
- Vertical settlement over 1/4 inch, or a straightedge gap that’s grown since your last inspection.
- Standing water that stays more than 24 hours after rain, especially if it’s repeated in the same spot.
- Root lift from a street tree or a large planting, where cutting the root isn’t a safe option.
- An edge restraint that has separated, tipped, or is pulling away from the pavement.
- Hollow sounds underfoot, which suggest the bed is bridging over a void.
At that point, the diagnosis needs to look at the base rather than the surface. Construction Berkeley offers free estimates in Berkeley, and we’ll measure the settlement, tap-test the base, and give you a straight answer on whether the right job is re-jointing, a partial reset, or a full rebuild. Call (844) 797-8850. We answer 24/7. Fast dispatch from 7am to 7pm, Sunday through Friday.
Frequently Asked Questions
Most Berkeley paver driveways need re-jointing every three to five years, or sooner if you see joints wider than 3/16 inch or you’ve pressure-washed the surface. Re-joint in the fall before the rains if the joints have opened over the dry season, and in the spring if they widened over winter. Call (844) 797-8850 for an exact quote on your driveway; estimates are free.
No, and sealing a moving driveway can make the problem worse. Sealant locks moisture in, so a pavement with base settlement will hold water under the surface and fail faster. Seal a structurally sound driveway, and fix the base first if there’s any settlement. Getting a second opinion before sealing is worth the call.
Sand washing out repeatedly points to a gap in the base or a joint that has opened because of base movement. If sweeping sand in fall doesn’t hold through the winter, the sand is draining through the base rather than sitting in the joint. That’s a base inspection, not another bag of sand.
Liquid amber, magnolia, and ficus roots seek moisture, and a joint-sand driveway is a path to it. Roots lift pavers, usually starting at the drip line or the border next to a planting bed. Inspect those zones first in spring and again before winter, and call if you find an even lift along a line. Estimates are free.
Re-jointing replaces the joint material and surface sand, which restores joint stability on a sound base. A base reset lifts the pavers, corrects or rebuilds the compacted base, and resets the surface. The split is measurement-based: re-joint if joints are wide but pavers are level, reset if vertical settlement exceeds 1/4 inch. Call (844) 797-8850 to get yours measured.
Sealing helps on a sound driveway because it keeps water out of the joints and reduces the wet-dry stress on the base. It should be scheduled only after the base has been checked, and it doesn’t replace joint sand maintenance. If there’s any settlement, correct that before sealing. Estimates are free.
Replacement makes sense when base failure is widespread rather than localized, when multiple zones have failed at once, or when the paver surface itself is beyond re-jointing. A partial reset handles a single failing area. Full replacement is the call when the same driveway is failing in three or more separate zones.
The Bottom Line
The maintenance schedule that protects a Berkeley paver driveway is built on measurement, not appearance. Inspect twice a year, in spring and fall. Track settlement with a 4-foot straightedge, and treat 1/4 inch as the threshold for base work. Track joint widths, and treat 3/16 inch as the threshold for re-jointing. Clear drainage channels before the winter rains, check edge restraint, and inspect the tree-root zones that most homeowners never look at.
None of that is a substitute for getting the base right in the first place. A driveway built on a properly prepared base over Berkeley’s expansive clay, with roots accounted for, will hold up decade after decade on that cadence. One with a thin base will fight you every season. If your inspection turns up movement, get a free estimate and a straight answer on the base before spending money on any surface treatment.
Construction Berkeley is a single-source contractor covering driveway and pavers, fence installation, home additions and ADUs, plus interior remodeling, roofing, and windows and doors. Our technicians have up to 9 years of experience, and we source from more than 50 manufacturer brands across every trade, which means the paver spec, the base design, and the fence and addition that touch your driveway edge can be settled as one coordinated project instead of three separate conversations.
Call (844) 797-8850 for a free estimate on your driveway and paver maintenance. We answer 24/7. Fast dispatch from 7am to 7pm, Sunday through Friday.
Written by the team at Construction Berkeley.